
1. 前提条件
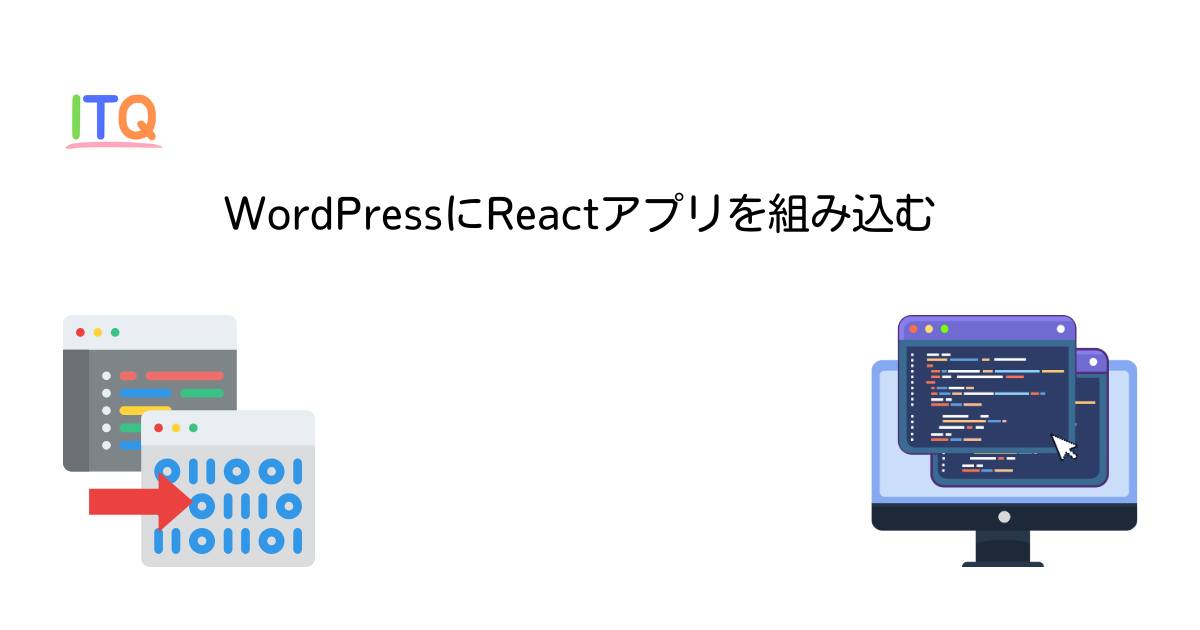
Wordpressの中に動的に動く仕組みを入れられないかと考えました。簡単そうなのはPythonかJavaScriptです。今回は、JavaScriptで動的プログラムを動かしたいということでReactを組み込むことに挑戦します。
Reactの開発環境は、MacでもWindowsでもLinuxでも良いです。
以下を参考に開発環境をご準備ください。

2. ローカル環境でReactアプリをビルドする
今回は、クイックソートのシミュレータを動かしてみます。
自分の開発環境で実行していきます。自分のホームディレクトリは/home/myhomeだとします。開発環境は、/home/myhome/developとします。この場合、/home/myhome/developで作業していきます。
まずはReactアプリを作成します。
npx create-react-app quick-sort-visualizationこれで、/home/myhome/develop/quick-sort-visualizationというディレクトリができてアプリ構築の一式がセットされます。自分独自のアプリ名をつける場合は、「quick-sort-visualization」の部分を自分のアプリの名前に変えて実行してください。(以下同様です)
/home/myhome/develop/quick-sort-visualizationができたので、そこに移動します。
cd quick-sort-visualization必要なライブラリをインストールしていきます。
今回はtailwind cssをインストールします。
※2025-04-24時点で、tailwindの最新版がうまくインストールできないので一つ前のバージョンをインストールして使うことにします。
npm install -D [email protected] postcss autoprefixer次に、このアプリにtailwindの設定ファイルを初期設定します。
npx tailwindcss init -pこれで、tailwind.config.jsができあがります。このままだとうまく動かないので、以下のように修正します。
module.exports = {
  content: ["./src/**/*.{js,jsx,ts,tsx}"],  // ← JSXに対応!
  theme: {
    extend: {},
  },
  plugins: [],
}
上記の「”./src/**/*.{js,jsx,ts,tsx}”」の部分を追記することになります。
さらにsrc/index.cssにも以下を追記します。
@tailwind base;
@tailwind components;
@tailwind utilities;
index.jsに以下を記載します。(書いてあれば確認だけでOK)
import './index.css';QuickSortVisualizationのコードをsrc/QuickSortVisualization.jsに保存します。(新規作成して保存することになります)
import React, { useState, useEffect, useCallback } from 'react';

const QuickSortVisualization = () => {
  // 配列とアルゴリズムの状態
  const [, setArray] = useState([]);
  const [steps, setSteps] = useState([]);
  const [currentStepIndex, setCurrentStepIndex] = useState(0);
  const [currentStep, setCurrentStep] = useState(null);
  const [sortingComplete, setSortingComplete] = useState(false);
  const [autoPlay, setAutoPlay] = useState(false);
  const [speed, setSpeed] = useState(500);
  const [arraySize, setArraySize] = useState(8);

  // クイックソートの各ステップを記録する関数
  const generateSortSteps = (arr) => {
    const steps = [];
    const array = [...arr];

    // 初期状態を記録
    steps.push({
      array: [...array],
      pivotIndex: -1,
      leftPointer: -1,
      rightPointer: -1,
      partitionStart: 0,
      partitionEnd: array.length - 1,
      sortedIndices: [],
      explanation: `初期配列: [${array.join(', ')}]。クイックソートを開始します。`
    });

    // クイックソートのアルゴリズム
    const quickSort = (arr, start, end, sortedIndices = []) => {
      if (start >= end) {
        if (start === end) {
          // 要素が1つの場合はソート済みとマーク
          sortedIndices.push(start);
          steps.push({
            array: [...arr],
            pivotIndex: -1,
            leftPointer: -1,
            rightPointer: -1,
            partitionStart: start,
            partitionEnd: end,
            sortedIndices: [...sortedIndices],
            explanation: `要素が1つの場合、既にソート済みです。`
          });
        }
        return;
      }

      // ピボットのインデックスと値を選択(ここでは最後の要素)
      const pivotIndex = end;
      const pivotValue = arr[pivotIndex];

      steps.push({
        array: [...arr],
        pivotIndex: pivotIndex,
        leftPointer: -1,
        rightPointer: -1,
        partitionStart: start,
        partitionEnd: end,
        sortedIndices: [...sortedIndices],
        explanation: `partition(${start}, ${end})を実行します。ピボット値として ${pivotValue} を選択しました。`
      });

      // パーティションプロセス
      let i = start - 1; // 左側の要素を追跡するインデックス

      for (let j = start; j < end; j++) {
        steps.push({
          array: [...arr],
          pivotIndex: pivotIndex,
          leftPointer: i,
          rightPointer: j,
          partitionStart: start,
          partitionEnd: end,
          sortedIndices: [...sortedIndices],
          explanation: `${arr[j]} とピボット値 ${pivotValue} を比較します。`
        });

        if (arr[j] <= pivotValue) {
          i++;
          // 要素を交換
          if (i !== j) {
            [arr[i], arr[j]] = [arr[j], arr[i]];
            steps.push({
              array: [...arr],
              pivotIndex: pivotIndex,
              leftPointer: i,
              rightPointer: j,
              partitionStart: start,
              partitionEnd: end,
              sortedIndices: [...sortedIndices],
              explanation: `${arr[j]} ≤ ${pivotValue} なので、${arr[i]} と ${arr[j]} を交換しました。`
            });
          } else {
            steps.push({
              array: [...arr],
              pivotIndex: pivotIndex,
              leftPointer: i,
              rightPointer: j,
              partitionStart: start,
              partitionEnd: end,
              sortedIndices: [...sortedIndices],
              explanation: `${arr[j]} ≤ ${pivotValue} ですが、同じ位置なので交換は不要です。`
            });
          }
        } else {
          steps.push({
            array: [...arr],
            pivotIndex: pivotIndex,
            leftPointer: i,
            rightPointer: j,
            partitionStart: start,
            partitionEnd: end,
            sortedIndices: [...sortedIndices],
            explanation: `${arr[j]} > ${pivotValue} なので、交換しません。`
          });
        }
      }

      // ピボットを正しい位置に移動
      i++;
      [arr[i], arr[pivotIndex]] = [arr[pivotIndex], arr[i]];

      steps.push({
        array: [...arr],
        pivotIndex: i, // 新しいピボット位置
        leftPointer: -1,
        rightPointer: -1,
        partitionStart: start,
        partitionEnd: end,
        sortedIndices: [...sortedIndices],
        explanation: `ピボット ${pivotValue} を正しい位置 ${i} に配置しました。これでピボットは最終的な位置にあります。`
      });

      // ピボットの位置をソート済みとしてマーク
      sortedIndices.push(i);

      // 左右の部分配列を再帰的にソート
      quickSort(arr, start, i - 1, sortedIndices);
      quickSort(arr, i + 1, end, sortedIndices);
    };

    // クイックソートを実行
    quickSort(array, 0, array.length - 1);

    // ソート完了のステップを追加
    steps.push({
      array: [...array],
      pivotIndex: -1,
      leftPointer: -1,
      rightPointer: -1,
      partitionStart: -1,
      partitionEnd: -1,
      sortedIndices: Array.from({ length: array.length }, (_, i) => i), // すべての要素をソート済みとしてマーク
      explanation: `ソートが完了しました!最終配列: [${array.join(', ')}]`
    });

    return steps;
  };

  // 新しい配列を生成する関数
  const generateArray = useCallback((size) => {
    // 重複のない値をランダムに生成
    const newArray = [];
    while (newArray.length < size) {
      const value = Math.floor(Math.random() * 100) + 1;
      if (!newArray.includes(value)) {
        newArray.push(value);
      }
    }

    setArray(newArray);
    const newSteps = generateSortSteps(newArray);
    setSteps(newSteps);
    setCurrentStepIndex(0);
    setCurrentStep(newSteps[0]);
    setSortingComplete(false);
    setAutoPlay(false);
  }, []);

  // 初期化
  useEffect(() => {
    generateArray(arraySize);
  }, [arraySize, generateArray]);

  // 次のステップに進む
  const nextStep = () => {
    if (currentStepIndex < steps.length - 1) {
      const nextIndex = currentStepIndex + 1;
      setCurrentStepIndex(nextIndex);
      setCurrentStep(steps[nextIndex]);

      if (nextIndex === steps.length - 1) {
        setSortingComplete(true);
        setAutoPlay(false);
      }
    }
  };

  // 前のステップに戻る
  const prevStep = () => {
    if (currentStepIndex > 0) {
      const prevIndex = currentStepIndex - 1;
      setCurrentStepIndex(prevIndex);
      setCurrentStep(steps[prevIndex]);
      setSortingComplete(false);
    }
  };

  // 自動再生の制御
  useEffect(() => {
    let timer;
    if (autoPlay && !sortingComplete && currentStepIndex < steps.length - 1) {
      timer = setTimeout(() => {
        nextStep();
      }, speed);
    }
    return () => clearTimeout(timer);
  }, [autoPlay, currentStepIndex, sortingComplete, speed, nextStep, steps.length]);

  // 配列サイズ変更時の処理
  const handleSizeChange = (e) => {
    const newSize = parseInt(e.target.value);
    setArraySize(newSize);
    generateArray(newSize);
  };

  // 現在の状態に基づいた配列の表示
  const renderArray = () => {
    if (!currentStep) return null;

    return currentStep.array.map((value, index) => {
      // 要素の状態に基づいてスタイルを決定
      let elementClass = "bg-gray-200"; // デフォルト(未ソート)

      // ソート済みインデックスの場合
      if (currentStep.sortedIndices.includes(index)) {
        elementClass = "bg-green-200";
      }

      // ピボット要素
      if (index === currentStep.pivotIndex) {
        elementClass = "bg-red-400";
      }

      // 左ポインタ
      if (index === currentStep.leftPointer) {
        elementClass = "bg-blue-400";
      }

      // 右ポインタ
      if (index === currentStep.rightPointer) {
        elementClass = "bg-yellow-400";
      }

      // 現在のパーティション範囲
      if (index >= currentStep.partitionStart &&
          index <= currentStep.partitionEnd &&
          currentStep.partitionStart !== -1 &&
          currentStep.partitionEnd !== -1 &&
          !currentStep.sortedIndices.includes(index) &&
          index !== currentStep.pivotIndex &&
          index !== currentStep.leftPointer &&
          index !== currentStep.rightPointer) {
        elementClass = "bg-purple-100";
      }

      // 要素の高さをその値に比例させる(最大値を制限)
      const maxHeight = 150; // 最大高さを制限(px)
      const scaleFactor = 1.5; // スケールファクターを小さくする
      const height = `${Math.min(value * scaleFactor + 20, maxHeight)}px`;

      return (
        <div
          key={index}
          className={`w-8 sm:w-10 md:w-12 flex flex-col items-center transition-all duration-300 ${elementClass}`}
          style={{ height }}
        >
          <div className="mt-auto font-bold text-xs sm:text-sm">{value}</div>
          <div className="text-xs mt-1">{index}</div>
        </div>
      );
    });
  };

  return (
    <div className="flex flex-col p-4 bg-gray-50 rounded-lg shadow-md mx-auto w-full" style={{ maxWidth: "800px" }}>
      <h1 className="text-2xl font-bold text-center mb-4">クイックソートの視覚化</h1>

      <div className="flex justify-center mb-6 w-full overflow-x-auto">
        <div className="flex items-end space-x-1 mx-auto">
          {renderArray()}
        </div>
      </div>

      <div className="mb-4 p-3 bg-white rounded shadow">
        <h3 className="font-semibold mb-2 text-sm">説明:</h3>
        <p className="text-sm">{currentStep?.explanation || ''}</p>
      </div>

      <div className="mb-4">
        <div className="flex flex-wrap justify-center items-center gap-2 mb-4">
          <button
            onClick={() => generateArray(arraySize)}
            className="bg-indigo-600 text-white px-3 py-1 text-sm rounded hover:bg-indigo-700"
          >
            新しい配列を生成
          </button>

          <button
            onClick={prevStep}
            disabled={currentStepIndex <= 0}
            className={`px-3 py-1 text-sm rounded ${
              currentStepIndex <= 0 ? 'bg-gray-300 cursor-not-allowed' : 'bg-blue-600 text-white hover:bg-blue-700'
            }`}
          >
            前へ
          </button>

          <button
            onClick={nextStep}
            disabled={currentStepIndex >= steps.length - 1}
            className={`px-3 py-1 text-sm rounded ${
              currentStepIndex >= steps.length - 1 ? 'bg-gray-300 cursor-not-allowed' : 'bg-blue-600 text-white hover:bg-blue-700'
            }`}
          >
            次へ
          </button>

          <button
            onClick={() => setAutoPlay(!autoPlay)}
            disabled={currentStepIndex >= steps.length - 1}
            className={`px-3 py-1 text-sm rounded ${
              autoPlay ? 'bg-red-600 text-white hover:bg-red-700' : 'bg-green-600 text-white hover:bg-green-700'
            } ${currentStepIndex >= steps.length - 1 ? 'opacity-50 cursor-not-allowed' : ''}`}
          >
            {autoPlay ? '停止' : '自動再生'}
          </button>
        </div>

        <div className="flex flex-wrap justify-center items-center gap-4 text-sm">
          <div className="flex items-center">
            <label htmlFor="speedRange" className="mr-2">速度:</label>
            <input
              id="speedRange"
              type="range"
              min="100"
              max="2000"
              step="100"
              value={speed}
              onChange={(e) => setSpeed(parseInt(e.target.value))}
              className="w-24 sm:w-32"
            />
            <span className="ml-2">{speed}ms</span>
          </div>

          <div className="flex items-center">
            <label htmlFor="sizeRange" className="mr-2">配列サイズ:</label>
            <input
              id="sizeRange"
              type="range"
              min="4"
              max="15"
              value={arraySize}
              onChange={handleSizeChange}
              className="w-24 sm:w-32"
            />
            <span className="ml-2">{arraySize}</span>
          </div>

          <div>
            <span className="font-semibold">進捗: </span>
            <span>{currentStepIndex + 1} / {steps.length}</span>
          </div>
        </div>
      </div>

      <div className="bg-white p-3 rounded shadow text-sm">
        <h3 className="font-semibold mb-2">カラー凡例:</h3>
        <div className="flex flex-wrap justify-center gap-2 sm:gap-3">
          <div className="flex items-center">
            <div className="w-4 h-4 bg-green-200 mr-1"></div>
            <span>ソート済み</span>
          </div>
          <div className="flex items-center">
            <div className="w-4 h-4 bg-red-400 mr-1"></div>
            <span>ピボット</span>
          </div>
          <div className="flex items-center">
            <div className="w-4 h-4 bg-blue-400 mr-1"></div>
            <span>左ポインタ</span>
          </div>
          <div className="flex items-center">
            <div className="w-4 h-4 bg-yellow-400 mr-1"></div>
            <span>右ポインタ</span>
          </div>
          <div className="flex items-center">
            <div className="w-4 h-4 bg-purple-100 mr-1"></div>
            <span>処理範囲</span>
          </div>
        </div>
      </div>
    </div>
  );
};

export default QuickSortVisualization;
src/App.jsを以下のように編集します。
import React from 'react';
import QuickSortVisualization from './QuickSortVisualization';

function App() {
return (
<div className="App">
<header className="App-header">
<h1>クイックソート(Quick Sort)</h1>
</header>
<main>
<QuickSortVisualization />
</main>
</div>
);
}

export default App;
src/index.jsの中にあるrootの部分をquick-sortに置き換えます。(※1)
const root = ReactDOM.createRoot(document.getElementById('quick-sort'));ここまでできたらアプリをビルドします。
npm run buildローカルで動かすには、あとひと作業します。
public/index.htmlを修正します。
<div id="merge-sort"></div>という箇所がありますので
<div id="quick-sort"></div>のように修正します。これは、先におこなった(※1)Domツリーのノード名をrootからquick-sortに修正したことへの対応です。これを行っておくことで、複数のアプリをノード名で切り替えられるようになります。(詳しい説明は長くなるので今回はここまでです)
ここまでできたらローカルで動かしてみます。
npm startデフォルトのWebブラウザが立ち上がってReactアプリが動作します。
まずは、第Ⅰ段階終了です。
3. ローカルからリモートへ作ったモジュール類を転送する
事前にsshでリモート環境へアクセスできるように準備しておきます。

まず、最初にリモート環境を整えます。
1. ローカルからリモートへログイン
リモートのサーバーへsshでログインします。
ssh -i ~/.ssh/(秘密鍵) (サーバーユーザー名)@(サーバー名) -p (ポート番号)それぞれを自分の固有値に設定してログインしてください。
2. リモートサーバーで格納用ディレクトリ作成
次に、Wordpressのインストールされたディレクトリに移動してwp-content/pluginsへ移動します。
このディレクトリに、プラグインの名称のディレクトリを作成します。
今回は、my-react-pluginとします。
mkdir my-react-pluginさらに、quick-sortを配置するディレクトリを作成します。
cd my-react-plugin
mkdir quick-sort
ここまでで、リモートサーバー側の作業は一段落です。
3. ローカルからリモートへファイルをコピー
作業は、先にアプリをビルドした/home/myhome/develop/quick-sort-visualizationで行います。
今回は、buildディレクトリ以下をコピーします。
scp -r -i ./ssh/(秘密鍵) -P (ポート番号) ./build/* (ユーザー名)@(サーバー名):/(自分の環境に合わせたディレクトリ)/wp-content/plugins/my-react-plugin/quick-sortこれでファイル転送完了です。
4. WordPressへの組み込み
1. リモートサーバーでWordpressの設定ファイルを記述
さて、2.の終わりの段階で、my-react-pluginディレクトリにいます。
ここに、my-react-plugin.phpというファイルを作成します。
function my_plugin_enqueue_scripts() {
    $plugin_url = plugin_dir_url(__FILE__);
    // quick sort 用
    wp_enqueue_script('quick-sort-js', $plugin_url . 'quick-sort/static/js/main.????????.js', array(), '1.0.0', true);

    // app2 用
    wp_enqueue_script('my-react-app2-js', $plugin_url . 'app2/static/js/main.????????.js', array(), '1.0.0', true);

    // CSSも必要なら読み込む
    wp_enqueue_style(
        'quick-sort-css',
        $plugin_url . 'quick-sort/static/css/main.????????.css',
        array(),
        '1.0.0'
    );

    wp_enqueue_style(
        'app2-css',
        $plugin_url . 'app2/static/css/main.????????.css',
        array(),
        '1.0.0'
    );
}
add_action('wp_enqueue_scripts', 'my_plugin_enqueue_scripts');

// ショートコードでそれぞれに対応する <div> を返す
function render_quick_sort_div() {
    return '<div id="quick-sort"></div>';
}
add_shortcode('quick_sort', 'quick_sort_render_div');

function render_app2_div() {
    return '<div id="root-app2"></div>';
}
add_shortcode('my_react_app2', 'app2_render_div');
上記では、quick-sortとapp2という2つのアプリを登録する場合を例にしています。
上のブロックでは、jsとcssを登録します。
下のブロックでは、登録したjsを呼び出すショートコードを登録します。
????????となっている部分は、ハッシュ値がそれぞれについているのでそれをlsなどで確認して置き換えてください。
2. WordPressのプラグインを有効化
ここまでくると、プラグインとして認識されます。
WordPressの管理画面で「プラグイン」を開きます。
「my plugin」というプラグインが表示されていると思いますので、有効化します。
3. ショートコードの設置
ここまでくればほぼ終了です。
このプラグインを設置したい箇所にショートコードを挿入します。
先のコードだと[quick_sort]や[my_react_app2]となります。
4. 動作確認
設置したショートコードからReactが呼び出されるか確認しましょう。
無事しれません。動作したら完了です。お疲れさまでした。
サンプルでつけたQuick SortのReactでお試しいただけると、より具体的なイメージが湧くかもしれません。

